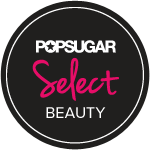
When I seen this style board I absolutely fell in love. For one... Teals and Nudes go so well together and are 2 of my favorite colors to pair with each other - especially with gold. But - I was really interested in this style board because the gorgeous sparkly nude platforms in the photo are the exact pair to what I received for Christmas from my hunny. This look is funny, flirty and very sophisticated. You can pair this look with a nice Neutral Eye or a soft brown smokey look. A nice soft creamy pink will definitely be a great addition to the whole ensemble as well. Gold is most definitely my choice for accessories with this combination because it will create a "Grown Up" type of feel with a little bit of "High Class" strut. I absolutely love this and it is definitely my style. One thing I would change would be the handbag - I don't normally go for a purse that can't fit my entire house, but if it were a night out on the town - this clutch style purse would work perfectly and I would totally rock it. Take this look from Daytime Working Girl to a Night out with the gals or your lover and you will definitely turn heads. I love it! The platform pumps were purchased from Just Fab and are called Jillian. If you haven't checked out JustFab.com yet - definitely check it out, sign up for a free account and check out the beautiful and sexy styles that await you.
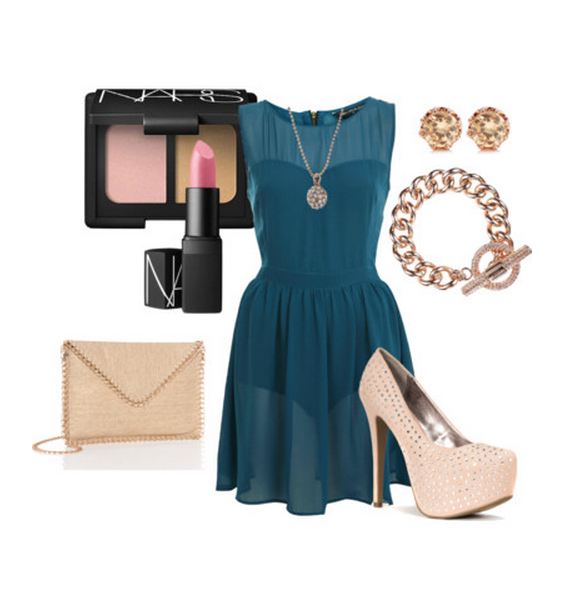
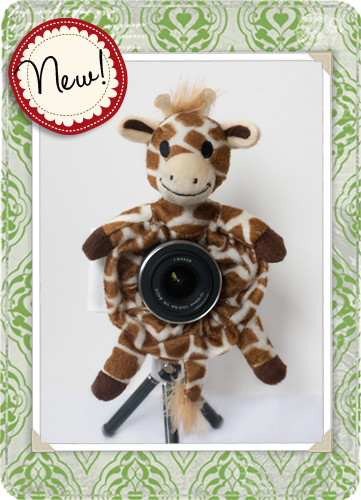
| | I have had the opportunity to work with many awesome Photography related companies in the past and this awesome company is no exception. Shutter Huggers is Patent Pending and was developed by a Mom... because we all know that as mothers - we are also photographers over night. :D The concept of this awesome tool is simple actually - it was developed to grab the attention of a child while leaving the parent or photographer their dignity instead of dancing around like a looney (which I happen to do quite often. lol All funniness aside, it really helps to free up your hands and makes your job so much easier to capture those awesome moments on camera.Check out my Video Review (embedded below) and scroll down to see the prices and where you can get this awesome product. | | Shutter Hugger Mommy
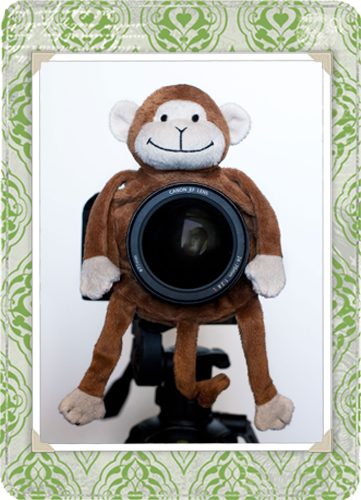
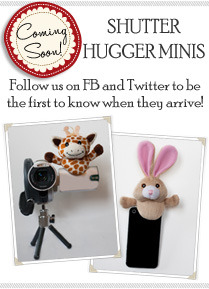
for smaller cameras | Monkey Shutter Hugger
for DSLR or SLR cameras. | This awesome creation is just $19.99 for the full sized Shutter Huggers and $15.99 for the Shutter Hugger Mommy which is the for smaller cameras like point and shoots. As a photographer I found it very useful in my portraits. It's an ingenious idea and is not only clever and functional - but it is also very affordable which makes it easy on any pocket book. I love the fact that it was made to fit most lens sizes - which for me, is a big deal. I also love the cuteness and of course, as a mother - that really plays a big part in photographing children. Shutter Huggers were featured on Bethenny and are definitely worth all the hype. You can collect so many different designs and as a photographer who spends a ton on equipment and my kit - this is definitely a must have if you are shooting little ones. My children absolutely love it and it has been a great asset to my gear. Thank you Shutter Huggers for sending me this awesome product to review. To pick up your awesome SH in your choice of animal and friend - visit: www.shutterhuggers.com and add a new buddy to your gear. xoxo Honey | | I'm Super Duper Excited for these upcoming goodies... Shutter Hugger Minis. Check out the Website and Follow Shutter Huggers on Facebook and Twitter to be the first to know when they arrive. This will be perfect for those of us that live with our Video Camera and phones attached to our hips. :) | Disclaimer: This item was sent to me for review and consideration. I was not paid or compensated in anyway to provide this review and all opinions are my own and 100% honest. The images in this post that are not taken by me are used from Shutter Huggers website for informational purposes only. I hold no copyright and give all credit to Shutter Huggers and the rightful photographer.
No Copyright Infringement is intended.
I am really proud to say that I haven't had the need to soften or remove blemishes from my Profile images lately and getting pictures up online have been awesome because I haven't had the need for much editing. While eliminating Foundation from my skin has definitely made a huge difference and a good skin care regimen - I think that the best thing that I could have done to my skin, hair and body was to add coconut oil to my normal routine.
I currently use Dr. Bonner's Virgin Unrefined and Organic Coconut Oil for my skin, hair and body to moisturize and so much more. This coconut oil has been a huge benefit and definitely has made a huge difference in how my skin feels and how good it has been looking lately. As I explain in the video - Coconut Oil has a number of uses. It has a natural SPF which is definitely a great benefit for me since I live in a climate that is sun baked year long. It's a great moisturizer that does not clog pores or create blemishes or pimples (unless of course you are allergic so please check with your physician). I have been using it in place of my regular moisturizer (Tilth Beauty) and it has done wonders for my skin. I also use it as a body moisturizer which helps to keep my dry skin and eczema at bay. Since I color treat my hair very often - it also acts as a great moisturizer for my hair as well without the added acne or pimples I can get from other leave in hair oils like Moroccan Oil and Macadamia Oil, so I can use this overnight or all day long without worry of a bad breakout. Do you have dry cuticles - use this oil to moisturize that as well. And, don't forget the cooking benefits as well as the help with weight loss and cleaning out the toxins from your body.
There are many other uses besides those that I mention in my video and in this post - many have used this for a number of benefits to help with health and skincare. As I mentioned in my video - Coconut Oil is a natural SPF. It works to prevent skin damage because of the natural constituents in the oil - which include antioxidants that help to protect your skin against those nasty free radicals which can indeed be caused by excess sun exposure. I also mentioned in the video that I ingest the coconut oil - yes, I did say that... lol It took me a few tries before I got used to the texture of it in my mouth, but trust me - it really does a body good. It helps to remove those toxins that are in your body and flush it out. It has even assisted many with weight loss which is one of the reasons I have also decided to ingest and see if it works. I'll definitely update more about the weight thing in another post. There is a lot of research that can be done with regards to coconut oil. It has said to clear up Yeast Infections, Thyroid problems and so much more. While I am not a doctor or health practitioner in any way - I really do think you should do the research yourself and see if you want to give it a try. Google: Benefits of Coconut oil and take the time to read up on it yourself. I think you will really be interested in what the sites have to say. It has certainly changed my way of life and how I do things and my skin has never been so soft.
I hope this little information on the product has helped and gave you some ideas. Remember, I'm no doctor... so what ever you decide, please check with your doctor first - I'm not liable for anything you do or did.
xoxo
Honey
Think of all the beauty
still left around you
and be happy.
-Anne Frank
Wishing all of my loves a Wonderful Saturday!
xoxo
Honey
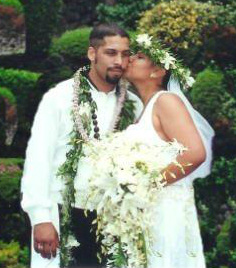
I love Throw Back Thursdays... it reminds me to stop and take a look at some of our old photos and reminisce on the good ol' days or the moments that make our heart melt.
In April my husband and I will be married 12 years. It's amazing how fast time has gone by - but it's even more amazing at how wonderful these years have been. We always stop to think about the moments that matter - those important moments that make us who we are and what we are. My life has had many many memories... great memories, but the moment that took my breath away - the one that made the journey all worth while, one of the most important moments in my entire life... My Wedding Day.
It was on that day - the 6th of April, that I married my best friend, my soul mate, my true love. It was on that day that I became a wife to the most wonderful man. It was the beginning to Our Forever!
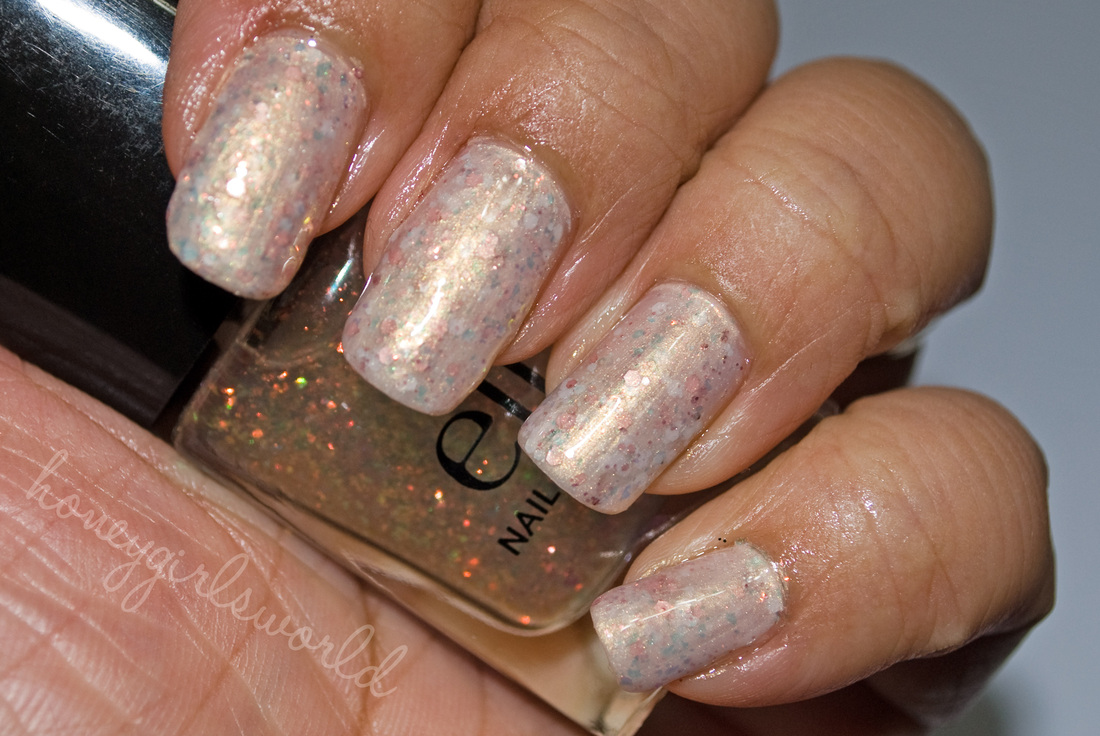
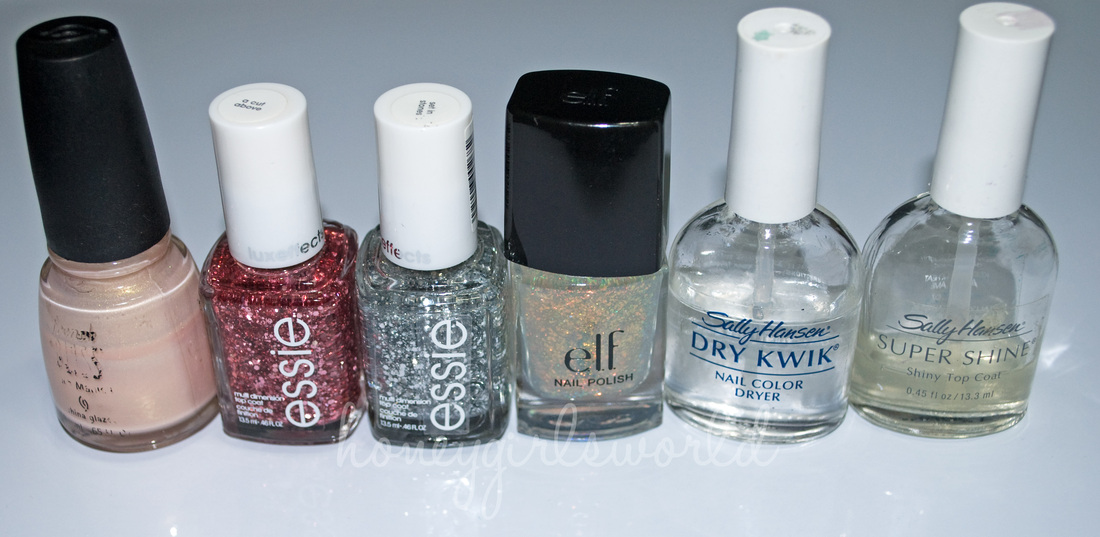
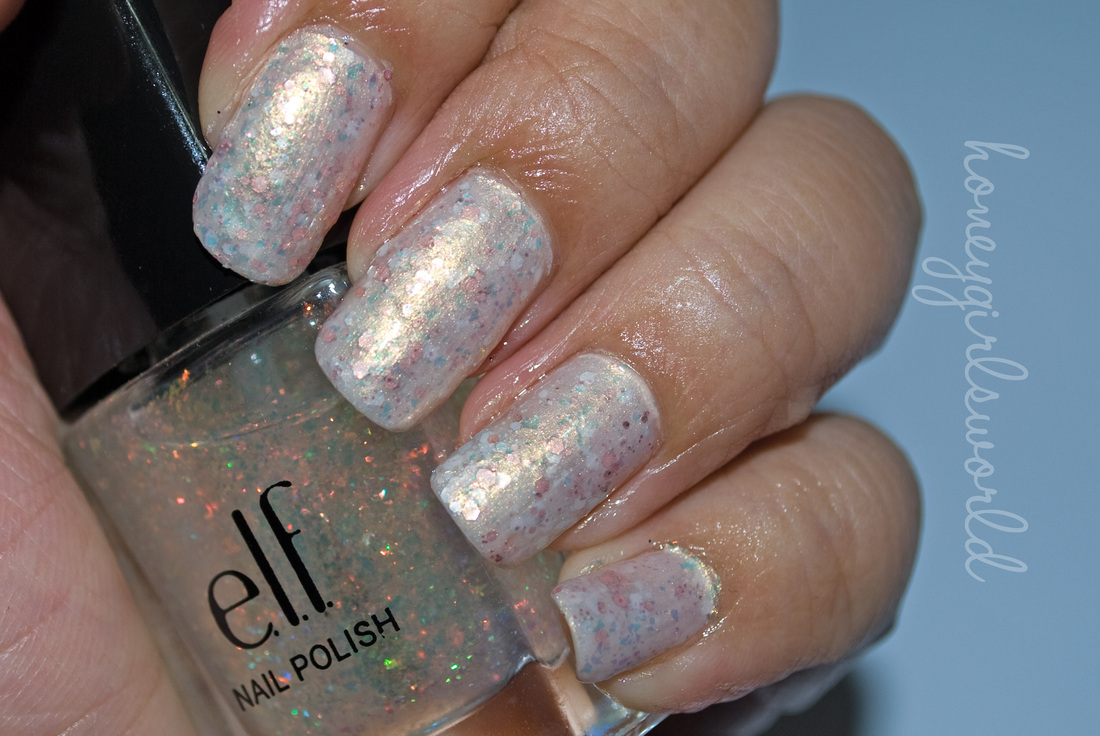
I have been reading blogs about the Jelly Sandwich technique Manicure and I have really been interested in trying it out myself. I don't have polishes that are "like jelly" so I used what I had on hand and figured I would use the technique as an inspiration. I used several layers and rushed through it since I'm the only one home with the boys and wanted to get it done - but I think that it came out really cute. :)  Products used:
Essie - Set in Stones
Essie - A Cut Above
China Glaze - Ooh La La Peach
ELF - Fairy
Sally Hansen - Super Shine Top Coat
Sally Hansen - Dry Kwik Nail dryer
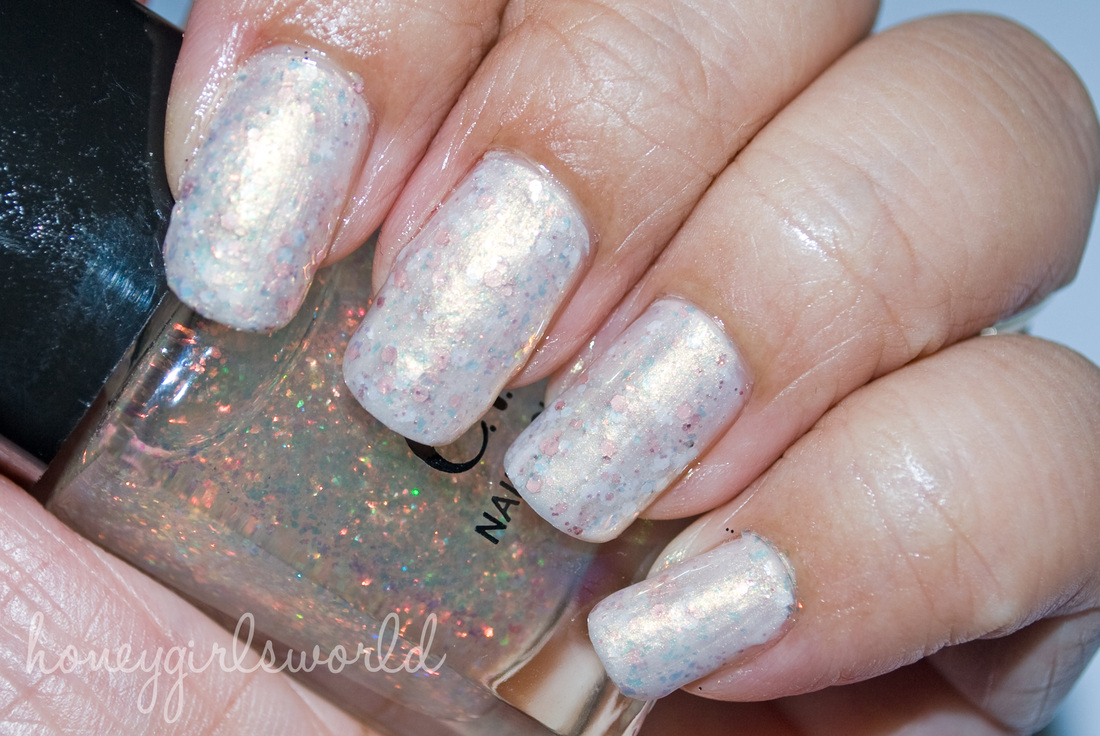
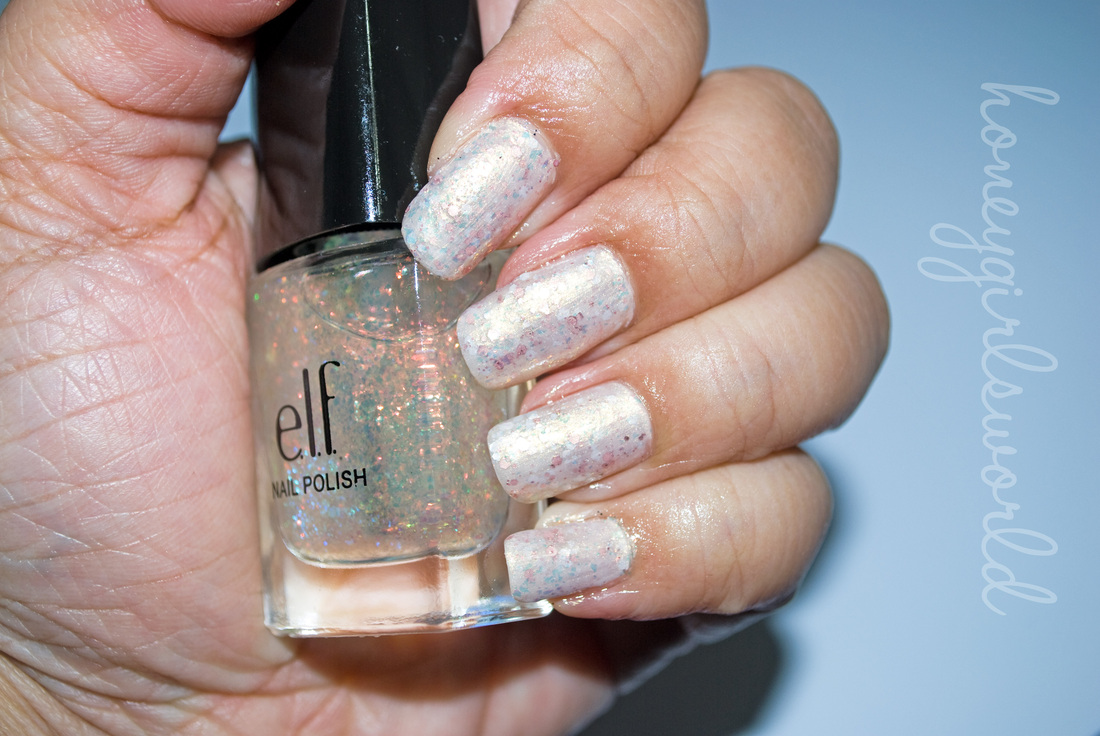
I really don't have very many milky nail polish shades. But I thought that my China Glaze Ooh La La Peach would go over the glitter really nicely and add a nice effect while the glitter still peaked through. I figured I would use ELF's Fairy - not only because I just love it but I thought it would add to the effect of the look as well. The cool thing about this nail polish combination is that it looks silver in one direction and light and then if I turn it another way or have it in another light - it looks peachy gold. I know a lot of it has to do with ELF's Fairy which is why I love this polish so much. While it is not exactly like the Jelly Sandwich technique - I think I put a little twist on it and made it more me. As I am typing this and my nails are drying, I'm staring at it and I really like it - I'm gonna be on the hunt for more milky type polishes or similar and do my nails like this more often. I like that it has a classy look to them, it still sparkles but in a different way - which makes it a lot more mature looking I think. I have some ideas in my mind on how I want to make my nails next... so stay tuned.
xoxo
Honey
 After I did my January Beauty Blogger HQ Task, I was asked several times about my Light Box set up. It didn't dawn on me to take a photo of it while I was typing out my post - but I promised I would do an update on it and at least post one photo of what my set up looks like. I'll explain a little about it and we can go from there.
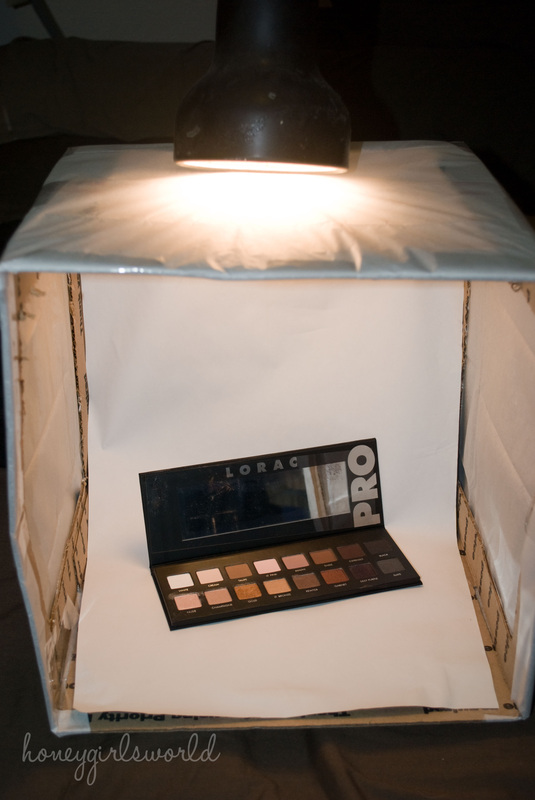
First - let me start off by saying that as a Photographer who shoots in a natural setting and on location, I never find the need to buy studio equipment or light boxes or even umbrellas and lights. I use natural lighting when at all possible and even my makeup photos are taken with natural lighting - so I don't often focus on all of this stuff. When I'm photographing products, I will take the photo on a nice white background (before I would use a damask print) and I shoot it out doors or right near my windows in my house to allow for the natural light to penetrate and illuminate my item. I love natural lighting. But - as most of you know, I run a business (several at that) and have children so a lot of the time, I am taking photos of products (reviews, etc.) at night. That really left me no choice but to kick it in high gear and get something done. I love using my flash light or the desk lamp (pictured) and add a make shift diffuser to it while I take the photo on a white background. That's my lazy man way and it can cause shadow which is not ideal. But - when I have some spare time, I pull out my little DIY light box. It consists of items that are pennies because I got the box from a shipment I received, the tissue paper I had on hand in my craft drawer, the scissors and tape I also had on hand and the white paper was something I had around the house as well.
I started by searching through my favorite photography websites to find out how to do a DIY Light box and found a ton of different tutorials. I will not do a tutorial on this but it is really easy. Simply cut squares into your box leaving the open end of the box facing you (one square on each side (left and right) and one on the top. I covered them with white tissue paper (layered them in 2 layers) and that's it. For your background - you want to take a white paper - something that is reasonably thick, like a cardstock thickness and tape it on the inside of the box. If you don't want it to have the crease in it - do not press the paper flat - leave it at a curve and tape it down. You can always decorate the box if you want - I just don't have the time so I leave it as is.
For proper lighting - it is best to have a lamp at each section (right, top and left) to help illuminate the item as best as possible. In my photo, I'm only using one lamp - because I'm using the other 2 for something else and couldn't take it for this post. I will normally just use one lamp anyway - if I need to have extra light, I'll take my heavy duty LED flash light and shine it into the covered square section that needs the best illumination for the photo.
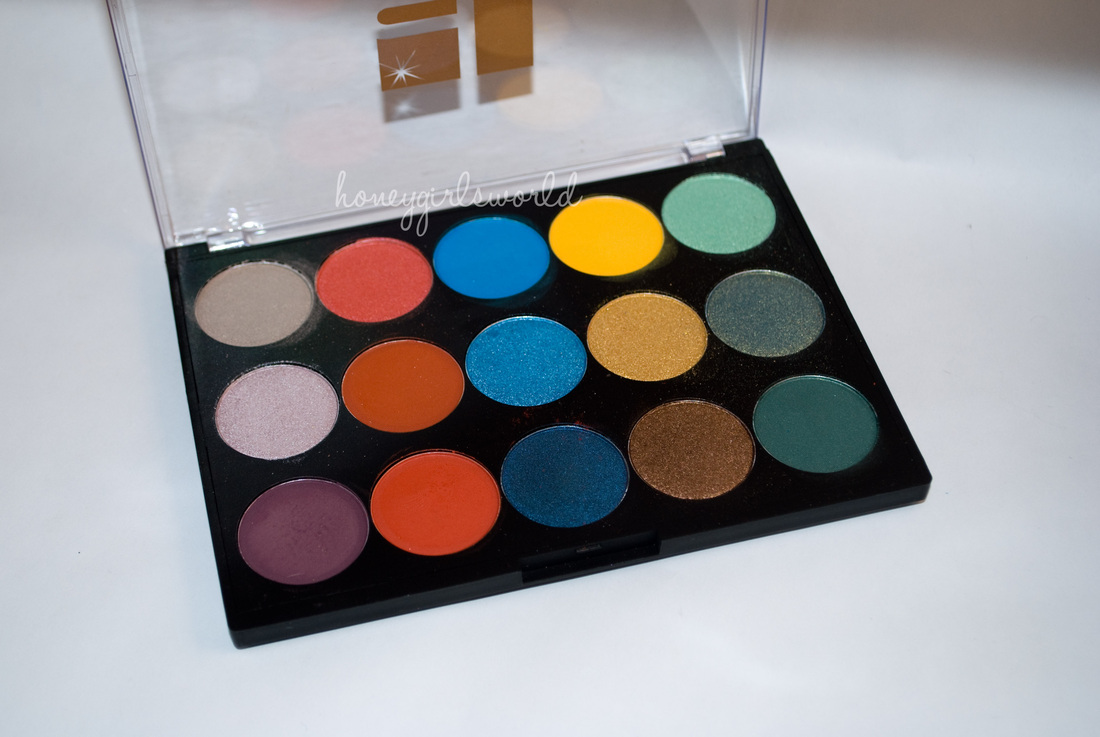
After I took the photo of my DIY light box - I decided that the best photo to show how clear and crisp the image is with the light box would be to take out my Starlooks Palette and photograph that. The colors are vibrant and you can see how true to color they really are when photographed in the Light Box. Obviously if I was photographing during the day - I would not use it, but since it's 9pm here - I am using the light box. If I took a photo of my Lorac Palette, while it would still be clear, I wanted you to see the color variation which the proper lighting will definitely bring out.
Like I said, this is more of an informational post than to teach you how to do it. But after looking at the photo of my Light Box and my explaining to you how to do it, I think it should be fairly self explanatory. Of course, if you want to buy one - that's great too, I just know I won't use it and this way I don't have to worry about throwing it out or damaging it because I only pull it out when I'm taking photos of products at night :)
Have a wonderful week!
xoxo
Honey
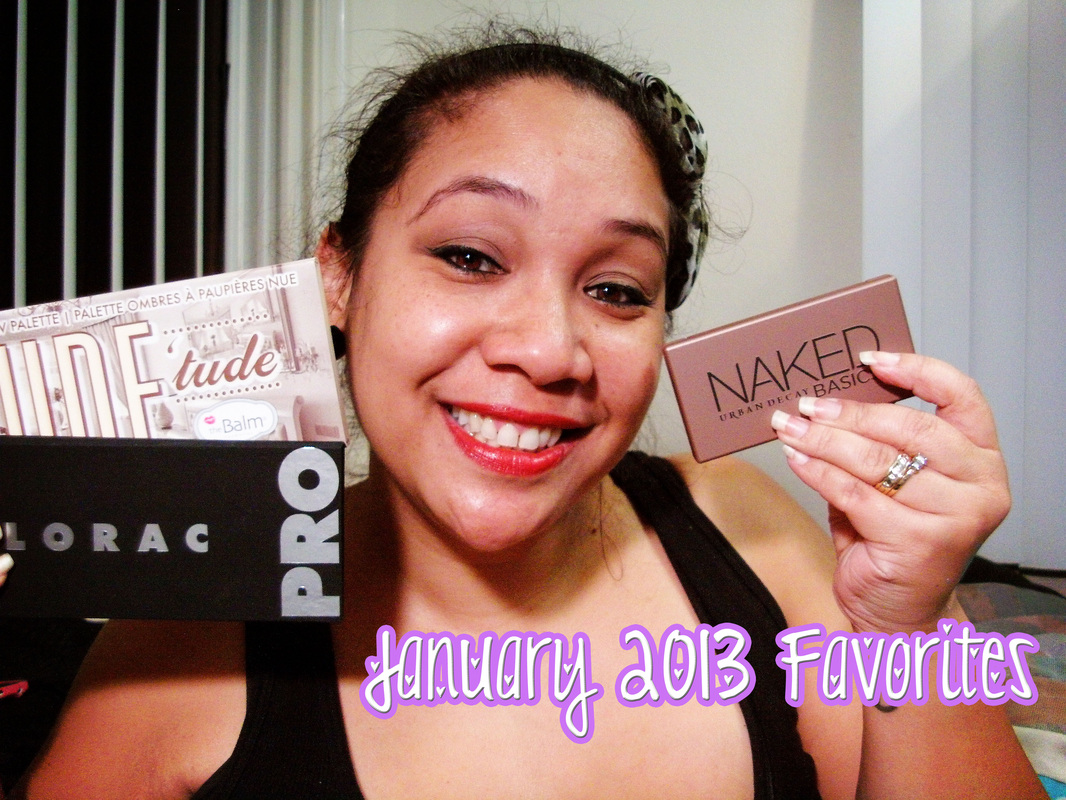
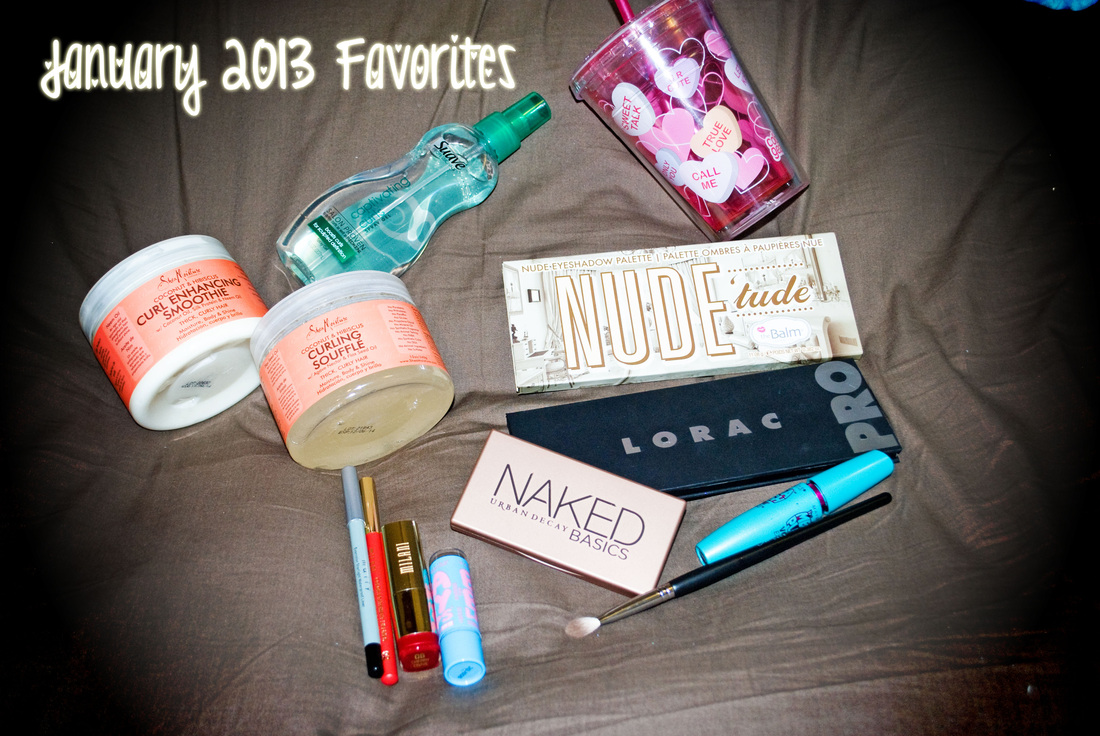
I had quite a list of favorites this month - all of which I think have either stole my heart or have completely made me forget about some of my other products. I'm thankful that for the month of January I was able to try out other products and see what was out on the market at the moment. Here is a list of my favorites for this month and my video below explains why I love each one. :) So don't forget to watch the video too. - My Awesome Cup with Conversation hearts on it
- Shea Moisture Curling Souffle
- Shea Moisture Curl Enhancing Smoothie
- Suave Professionals Captivating Curls Spray Gel
- Mally Ever Color Starlight Waterproof Liner in Midnight
- Sedona Lace EB 09 Brush
- Milani Color Statement Lipstick in Cherry Crave - though all of the Color Statement lipsticks in Reds and Oranges that I own Kick Ass!
- Milani Color Statement Lipliner in True Red
- Maybelline Baby Lips
- Maybelline Mega Plush Volume Express Mascara in Very Black
- The Balm's Nude Tude Palette
- Lorac Pro Palette
- Urban Decay Naked Basics Palette
xoxo Honey
February 2012 Beauty Blogger Headquarters Task
This month's Beauty Blogger Headquarters Task is definitely an interesting one. I'm to talk a little about a Blogger's Office and Organization. Let me start by saying... I am a very anal worker, while my desk may be cluttered, you can come into my office and ask me for a paper you gave me 2 years ago and I can find it in less than 1 minute. lol I wouldn't consider it cluttered because everything has it's own place. I just have so much going on in my real life and work life that there are many factors that contribute to my work space. I thought this would be a fun post to do and definitely wanted to take part in the task because it is always interesting to see how others keep organized. So, let's get started.
This image is not me but just a cute representation. lol This image is from: http://www.laptopbaglifeline.com/2010/12/get-organized-and-clean-up-your-office-you-can-do-it.html and in no way am I claiming ownership or copyright. All rights belong to the owner. I am just borrowing the image. Where do you blog? Do you have a space dedicated to your blogging work? An office, a table, a corner of your room...
Honestly, I would be lying to all of you if I said I only blogged at my desk. lol - I blog when ever and where ever my children and time allow. If you have 3 children, 2 of which are twin 3 year olds - you would probably be just like me and blog when the opportunity presents myself. I don't technically have an office, but I do have a great size desk that is filled with lovely paperwork that I'm consistently working on. Thanks to my hubby that builds our Desktop PC's to run to it's optimum speed, so if at all possible - I do all of my best work there. Since I run several businesses, I do my best to make sure I can work at my desk. All of my paperwork, forms, USB's, External Hard drives, etc. are all there and since most of my jobs have to do with heavy photos, etc. - I need to have access to all of that majority of the time. I share my desk space with our living area so it also allows me to keep one eye on my sons and still manage to get work done at the same time. However - blogging is a little more complicated. I spend some of my day in the car and since I wait for my son to finish with school - I'm usually in need of something Mobile. That's where my phone, tablet and laptop play a role in my day. Those three items all share the same capabilities and apps that allow me to transfer data back and forth on a program I love to use called Evernote. I can type out my blog post via phone or other mobile device and save to Evernote, which allows me to copy and paste into my blog platform while I'm at my desktop. This allows me to write things down in drafts should something come to mind and I can use any device and run away to my room when the hubby is home to get some work done. :) What do you blog on? Computer, laptop, tablet... what do you recommend?
I believe I answered the question in #1 - but to just lay it out there again - I blog on a PC, Laptop, Tablet and my phone. Since I have carpal tunnel, I think ideally a computer with a great keyboard is the best recommendation I can give. As I mentioned before - my hubby builds our computers for speed and performance, so that also allows me to use a lot of large file images without slowing down my computer. So you always have the ability to use your computer for whatever means possible when blogging. While it is not ideal for traveling, if you are a home body - I think it will work out great and suffice where needed. Of course - if you are like me and are always on the go - I truly think a great phone with a good keyboard, or even a travel keyboard will get the job done if you are looking for something to update posts or if you have thoughts you have to get down before your forget them. :)
Do you have any blogging rituals? Drinks, music, movie, candles...
Lol, Rituals... for me - every thing tends to be a little bit of spur of the moment and get it done. lol The boys are usually watching television behind me or playing games or with their toys, so I capitalize on that and get to work. There is one thing I truly enjoy when blogging and that is Pandora. I love that I can turn it on via my phone or computer and listen to my favorite jams. Songs from Motown, the 90's like TLC, Aaliyah, Jodeci, Queen Latifah and Ashanti and 80's music gets me going and my mind just can totally get in the groove. I also love Hall and Oates and Chicago. I turn up the tunes and just plug away at what ever is on my mind. The song I'm listening to right now is: Respect by Aretha Franklin.
I will always have one of my tumblers full with water because I drink water constantly during the day and of course, I will have a candle burning if my asthma is not acting up. How do you keep your blogging ideas organized? Notepad, planner, post-its...
Hmmm... I type most of them into my phone or I have a little notepad that I use. But - the notepad gets lost in the shuffle of things on my desk. lol Contrary to what it looks like, my desk is really not that messy... I just host a lot of things here that belong to me and the boys and paperwork is on one corner of the desk as well... so I try to make things as electronic as possible when it comes to ideas for my blog. :) Do you have a blogging schedule for the week? Or the month? If so, how do you stay on top of it all?
I used to do my best to blog each and every day. Even if I didn't publish it and saved my thoughts as a draft, at least it was there for me to go back to it. But my businesses keep me very busy - so now, I just plug and play where ever possible. My ideal would be to spend at least one hour on my blog each day - even if it is just to stop in and say hi - that's my goal this year and I think even if I haven't been keeping to that schedule, I'm still updating much more frequently than 2012 - that year was major FAIL. lol
If you review products, how do you keep track of what needs to be reviewed in your collection?
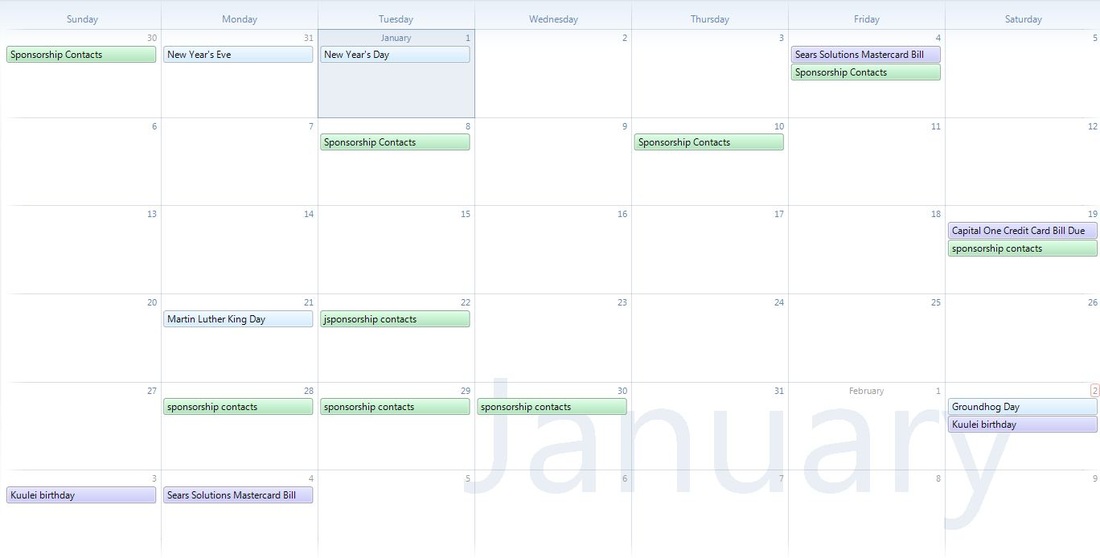
Normally - I will log the item in a 12 month planner you can get at Walmart or Office Max. I will log the date the company contacted me or vice versa as well as the day I received the products. I will also go ahead and jot down when I started using the products and mark the date in the calendar if the company requires me to have a review done by a certain time frame. However, this year (2013) I haven't been remembering to pick up my new Day Planner, so I have been kind of stuck using the calendar in Outlook. This is not my preferred method, because as you can see - I really cannot see what companies I've been dealing with at first glance. I literally have to open up the calendar task or date to see what it is. This does allow me to open up and get more detailed notes in there and of course I do type faster than I write, so that leaves a few positives. But, since I can get several shipments in one day - I can't simply type out all the companies who's products I received in that one day - it would never show the entire thing. For the time being - this will work until I have figured out a system in my Evernote (which I mentioned above) that will allow me to categorize everything a little better. :) What do you do with all your "old" data? Photos, videos, extra drives, online storage...
Well, as most of my readers and followers know, I am a Professional Wedding & Portrait Photographer. For that reason, by law - I am required to hold all of the images of my clients for a minimum of 7 years. So for this purpose, I have several places I hold old videos and photos. The first place, of course is my internal hard drive on my computer. I need to seriously get in the habit of transferring the items over to my external HD and dvd's a lot more often in case of computer mishaps - but I fail at that when it comes to blogging and stuff. I have 3 External Hardrives - 1 - 2 TB Hard drive, 1 - 1 TB Hard drive and 2 - 200 GB Hard drives, right now those are the ones that I'm currently saving to, the rest are in storage. A lot of my videos I try to burn to DVD to keep out of site, out of mind unless I need to re-upload again (and YouTube can always have issues so I do keep my videos handy for that reason). I also have several 4 GB and 8 GB SD cards but I normally do not store any information on those because they get swapped out of my cameras often. While I have other means for storage, those are the ones I tend to use the most. I have online storage for Photos from my Photog business, so I don't think that counts. lol
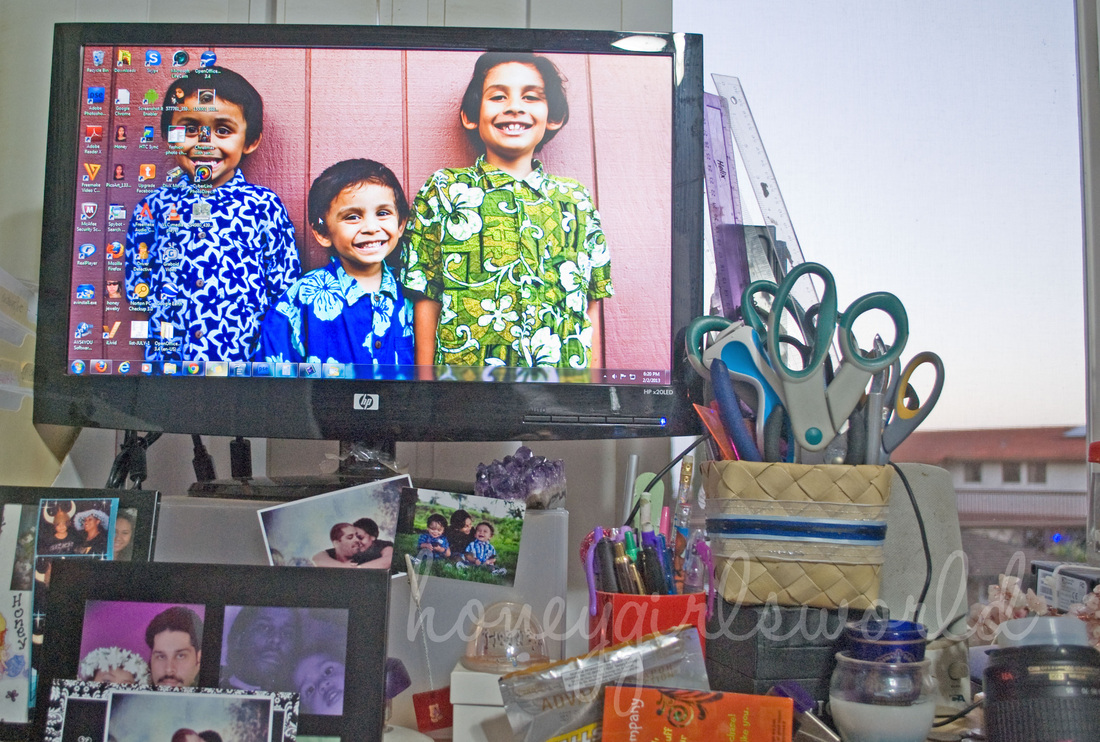
For fun, what beauty/non-beauty products do you need to have on hand near your blogging station? Hand lotion, lip balm, chewing gum...
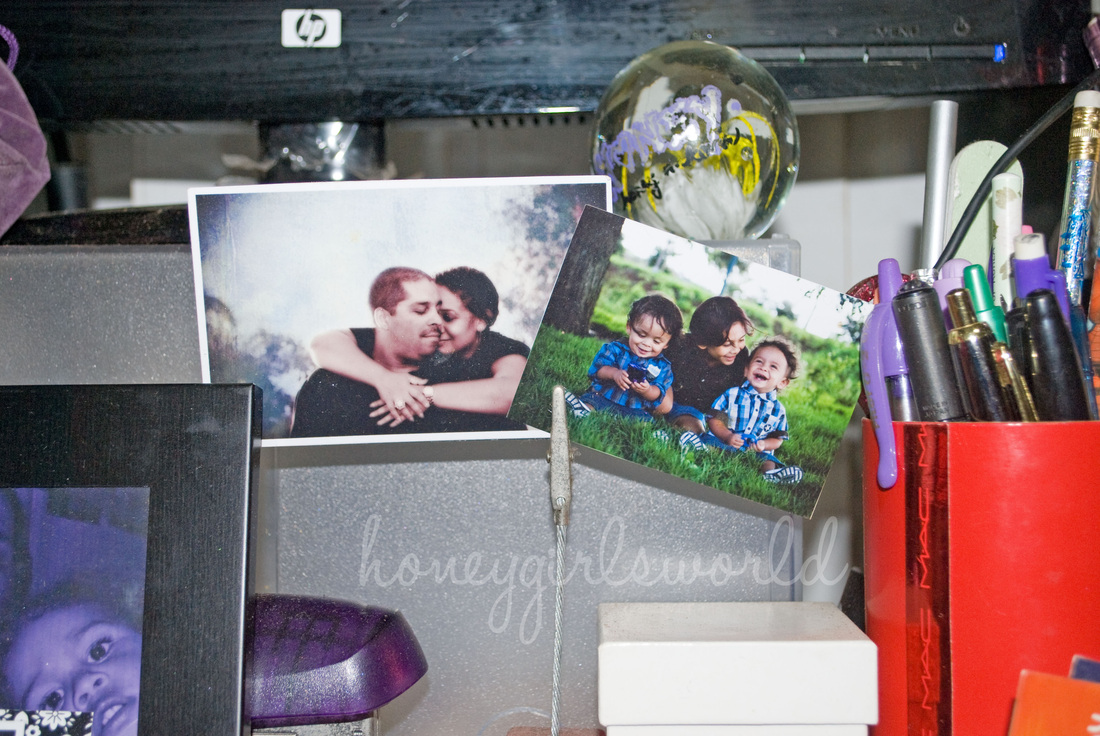
Lol - this was a cute question. I always have one of my EOS lip balms on my desk. I am a lip balm fanatic, so you will always see it there. I need to always have my cup of water on my desk as well - I cannot work without my water cup filled or I feel incomplete. In my side drawer of my desk you will always find lotion and hand sanitizer. It's a habit I developed when I worked in the corporate world, I always applied lotion and hand sanitizer through out the day - so because of that, I took on those habits when I started working from home. And, last but not least, you will always see photos of my family around my desk, even if I see them every day. My hubby works long hours very far away and he is not always near me when I'm blogging. I find that if I have a brain fart or my mind draws a blank, I can take a second to look at his or my sons' photos and whatever I couldn't remember or blanked on will always come to me. They are my muse and no matter where my office will be some day or in the future, that is one thing that will never ever change. <3
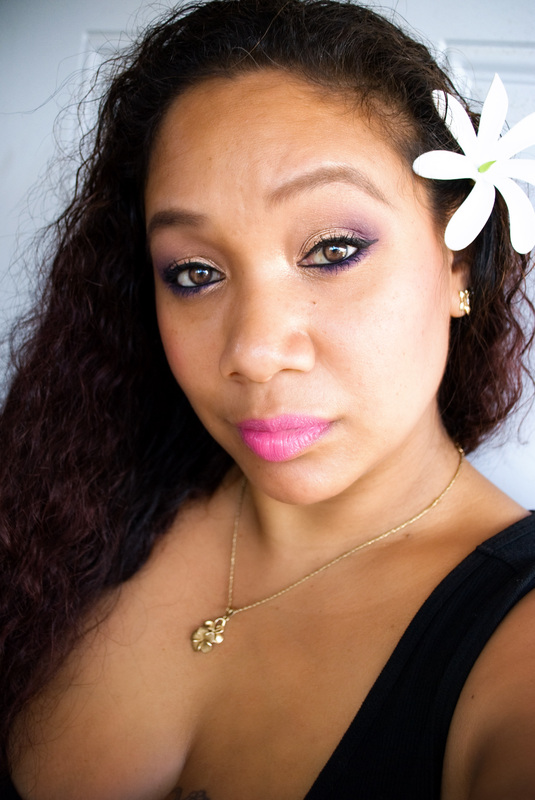
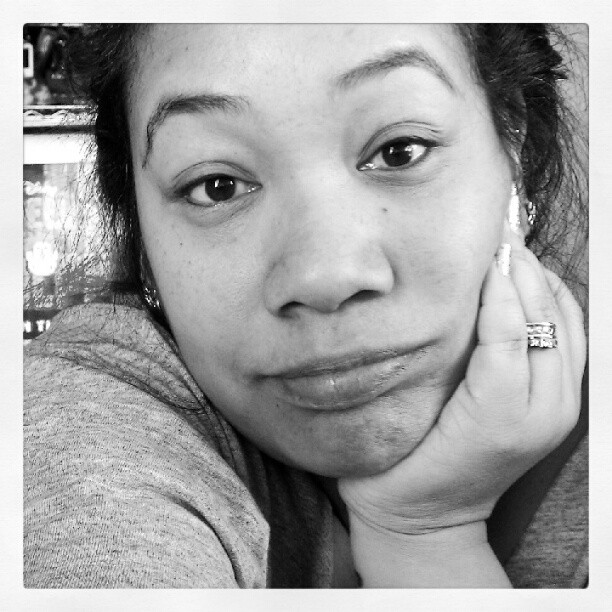
If you have been following me a while, you know that I was never big on smiling in my photos before. I don't think it had anything to do with the color of my teeth, considering my teeth are fairly white. But after using this product, even if I was not too keen on actually showing the gap in my top teeth or having my chubby cheeks push my eyes up - I have been smiling a lot more in my photos. I think just adding that extra confidence to your self perception and your all around beauty definitely helps you to feel so much better about yourself.
Let's face it - we live in a society where you are judged about how you look, the color of your skin, the clothes you wear and yes... the color of your teeth. So when your teeth are just a little bit whiter - it definitely makes a difference.
As I mentioned in my video review (posted/embedded below) - I am well over due in posting this review. I like to try things as thoroughly as possible and I also like to try and use certain items in combination with others that I currently use to see how they add up and if they work well with one another.
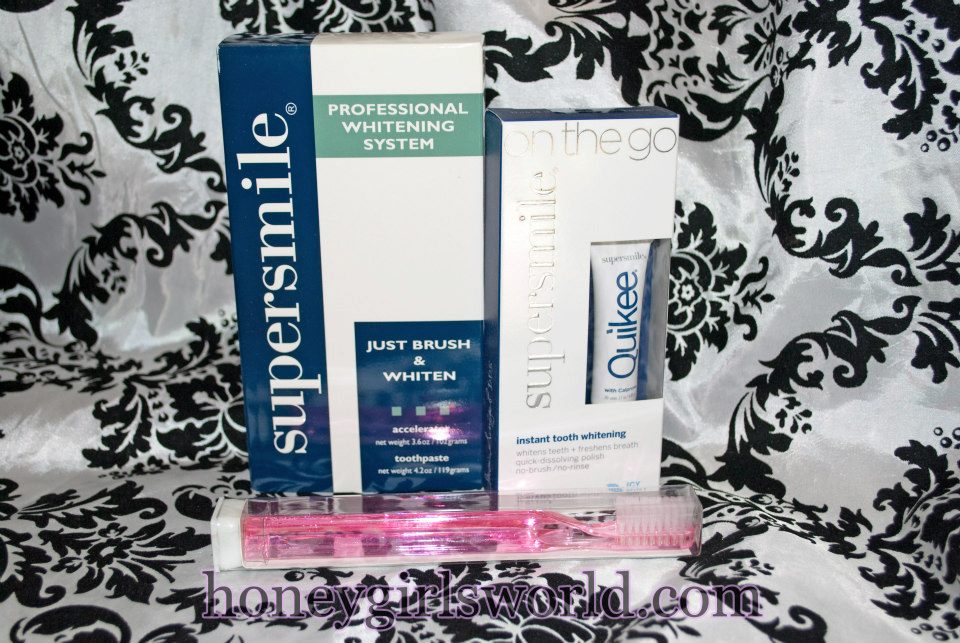
I'm not going to get into too much depth and detail in this post as I felt that I did a pretty in-depth review in my video. But - I can say this has absolutely been the best Teeth Whitening system I have used to date and I have used A LOT!
For the price, you get a system that will not only whiten your teeth but make them feel clean. It's not even that expensive - approximately $30 for a starter kit. I only wished I was able to really take some photos of my before and after because I was completely amazed at how much this product whitened my teeth in very little time. Not only did it whiten and clean my teeth, but it did not make my gums or my teeth sore and uncomfortable - something that happens all the time when I use other over the counter or even expensive teeth whitening products.
So - check out the review I posted below and if you have tried Super Smile before, please let me know in the comments here or on my video - I would love to know your thoughts. :)
xoxo
Honey FTC: These products mentioned in this post was sent to me for review and consideration in exchange for my honesty about the product. I was not paid in anyway to provide this review and my review/thoughts and opinions are 100% my own and are unbiased.
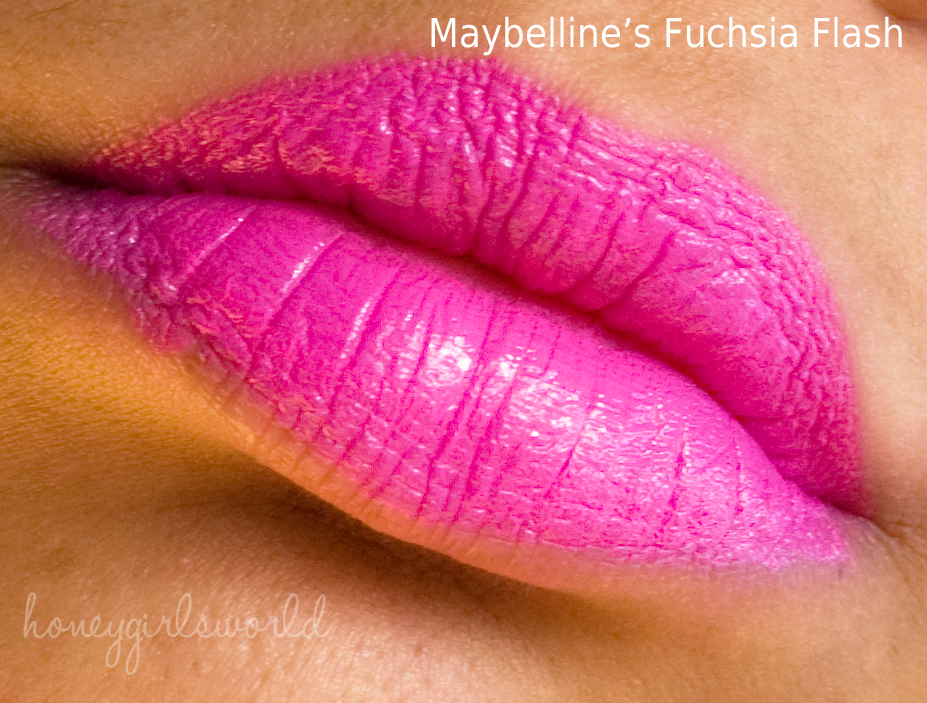
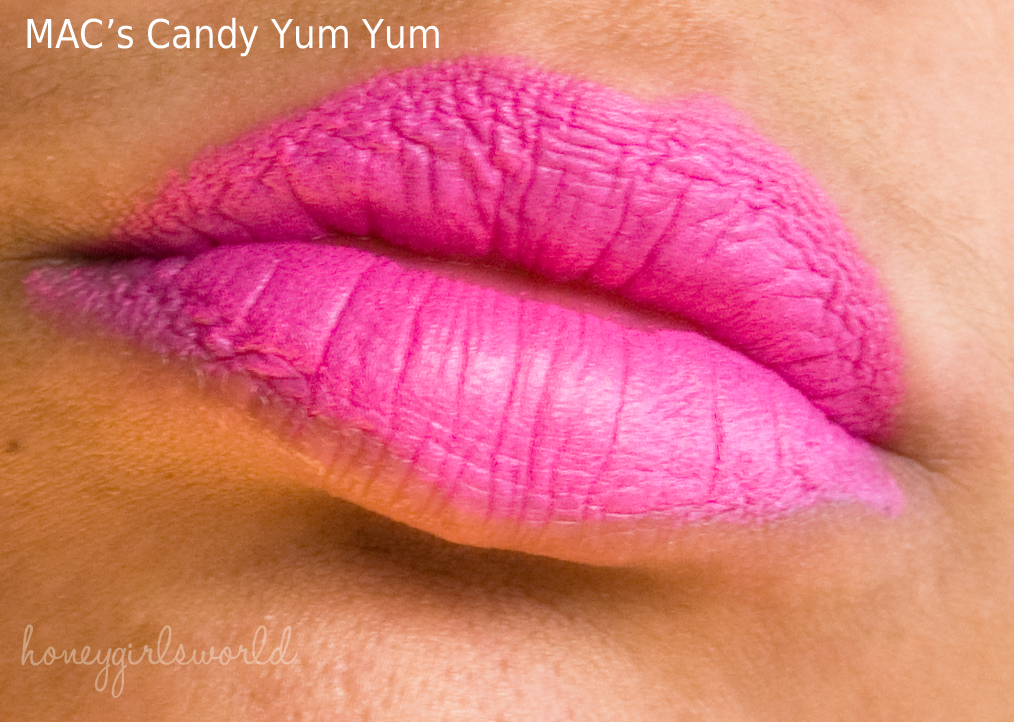
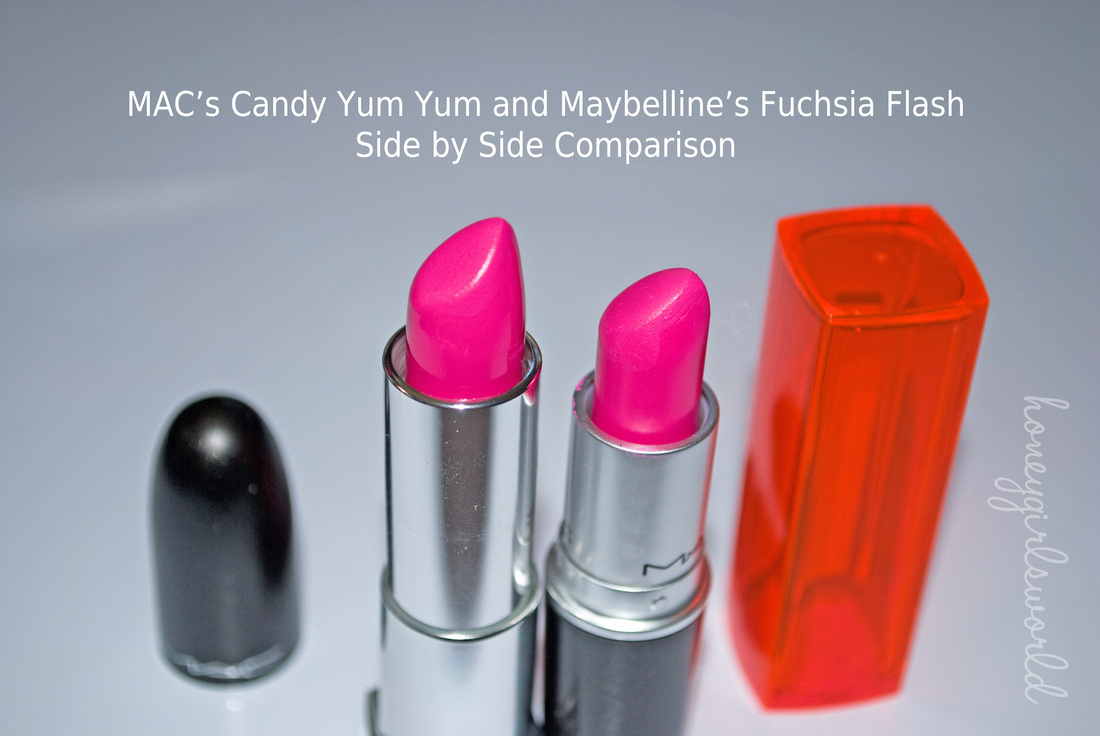
Facebook is such an awesome place for friends and to find out awesome things and that's exactly where I heard about Maybelline's new Vivid Lipsticks and the color Fuchsia Flash. Now - I hauled my MAC Candy Yum Yum a week or two ago after I took my Back 2 MAC items in and decided to get it. I'm happy with the fact that technically it was free *yay me!* But just a few days later, a friend of mine, Maria - posted the new Maybelline Vivid Lipstick in Fuchsia Flash and it looked so similar that I was on the hunt for it. The above photo is a side by side comparison - MAC on the Left, Maybelline on the Right. While my camera didn't really pick up a difference in the sheen, there definitely is that main difference between the two. MAC's Candy Yum Yum (CYY) is a dry based Matte Lipstick, like most or all lipsticks that MAC offers that are matte. It's one of those types of lipsticks that you literally have to moisturize liberally or it can totally dry out your lips or make your lips look dry. But - because of MAC's awesome formulation - you can be prepared to have this lipstick for long wear use. If I'm looking for a punch of color but want it to be toned down just a bit and last a day - I'll blot on a napkin and it will pretty much stay for hours. It leaves your lips with a slight stain that will give it that bold look into the night if you're not constantly licking your lips or eating and drinking. I love the stain - because I can add a little bit of lip balm over it and still have a vibrant color after the lipstick has rubbed off. Maybelline's lip color has a shiny finish to it - like a matte color with built in gloss. It does slightly stain the lips, but not nearly as long or as much as MAC's CYY. However, what I love about it is that it really is moisturizing and leaves your lips with a little bit of shine. For me, this is ideal because I do not really like sticky glosses or lip gloss in general unless I want to really bump up a look - so this will give my lips the right amount of shine without the sticky feel that many lip glosses offer.
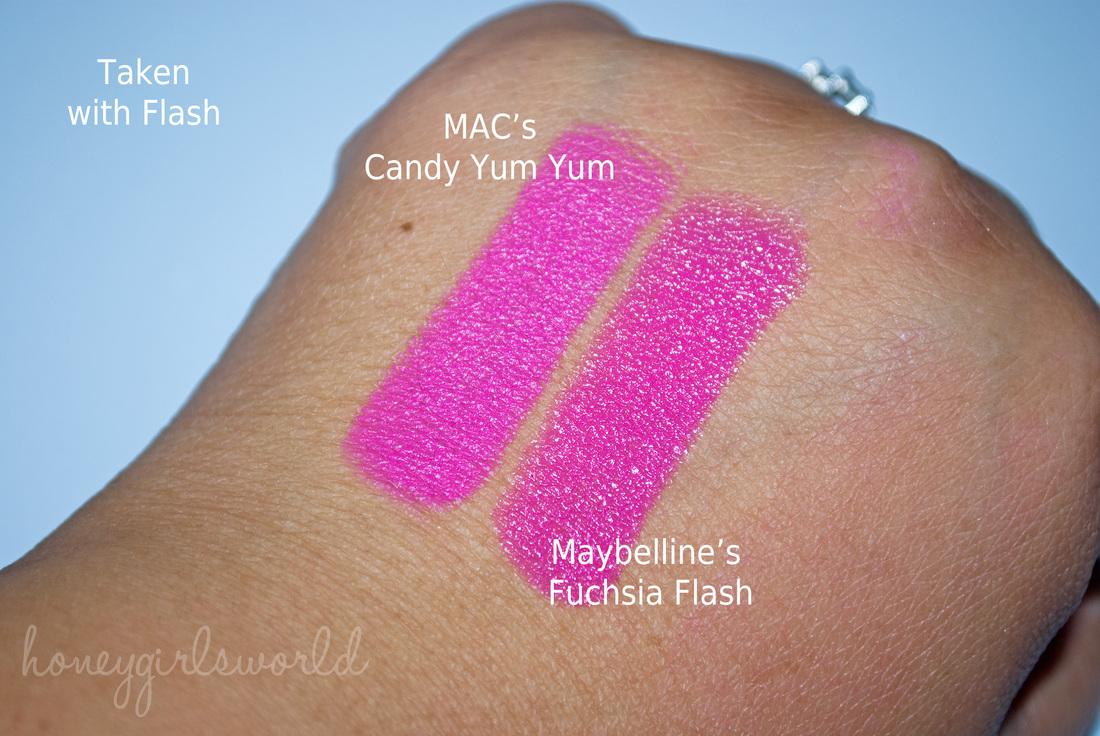
Shown side by side above - the lip swatches show the different sheen of the lipsticks really well. This also will allow you to see how close these products are in comparison to one another. Above I took photos of the swatches on my hand. One set with flash and the other without so you can see how similar they are. Even in different lighting situations - both colors mimic one another and still show the similarities between the two. Again - the only real difference is the shininess of the Maybelline, verses the extremely matte of the MAC one. Now - I am very very anal when it comes to comparing colors and providing a dupe for one or the other, because many times people look at a color and think it is the same when their sheens are different, their textures and their all around color turns out to be different when applied. However, while the sheen of the lipsticks are very different, one shiny - one matte, they offer the same type of application. Maybelline's shiny lipstick is more of a matte with gloss so it still holds very similar attributes. Packaging of course is totally different from one another as is the price point. But I would consider this to be a dupe because even with application on the lips from each - you still get the same color pay off and result as well as pigmentation from both. I'm truly impressed and tip my hat to Maybelline, awesome job with this collection.
Of course - it is up to you whether or not you want to spend your money on a MAC Lipstick or save about half the cost and get the Dupe (Maybelline lipstick). If you are truly looking for a dry formula matte lippy - I would spend the extra money for the MAC one, but if the sheen/texture does not bother you too much - go for the Maybelline version. They both have the same amount of product and both offer you high pigmentation and all around coverage for a lip color. I'm glad I have both because each will serve a purpose and a reason for why I use them, but honestly - if I knew about the Maybelline one before I traded in my B2M for CYY - I would have bought the one from Maybelline and traded in for another color when I went to MAC. For half the cost of the MAC lipstick (MAC's lippies are $15.00 and Maybelline's I got mine for $6.29 at Kmart) - I thought it was a deal.
I hope this helps any of you that have been wondering or interested in this possible dupe. I tried to take photos as best as possible to allow for the colors to be compared as perfectly as possible. At the end of the day - you will buy what ever makes you happy - all I care about is that it makes you smile and you are happy with your purchase. <3
Have a wonderful weekend!
|


 RSS Feed